
As an Amazon Associate I earn from qualifying purchases and sometimes recommend products from other sellers at no extra cost to you. For more details see my disclosure policy and privacy policy.
There are few things more satisfying on a hot summer day than biting into a cold, creamy ice cream waffle sandwich. The crisp, golden waffles give you that slight crunch, the vanilla ice cream melts just a little at the edges, and the whole thing feels way more special than anything you could pull from a box. The best part? You can make them at home with just a handful of ingredients and have a batch ready to freeze in under 30 minutes.
This waffle ice cream sandwich recipe is the kind of treat that works for absolutely everyone — kids go wild for them at birthday parties, adults love them as a nostalgic summer dessert, and they’re genuinely easy enough to pull together on a weeknight. Make a big batch, wrap them up, and stash them in the freezer for whenever the mood strikes.

Why You’ll Love This Recipe
- No special skills needed. If you can make waffles, you can make these. The recipe uses a simple batter and the waffle maker does all the hard work.
- Completely customizable. Vanilla is the classic, but you can swap in any ice cream flavor you love — the variations are endless.
- Perfect for making ahead. These freeze beautifully, so you can prep a whole batch days before a party or just keep them stashed for an easy dessert on demand.
- Kid-friendly and crowd-pleasing. Few desserts get the same reaction from both a five-year-old and a grown adult — this one genuinely does.
What You’ll Need: Equipment
Having the right equipment makes these so much easier. A good waffle maker is the obvious essential here — a standard Belgian waffle maker works well, though a thinner, crispier waffle iron gives you a sturdier sandwich that holds up better once frozen. If you’re in the market for one, look for a model with adjustable browning settings so you can get the waffles exactly how you like them.
You’ll also want a good ice cream scoop to portion the ice cream evenly between waffles — a trigger-release scoop makes this much easier than a spoon. A flat spatula helps press everything together neatly, and a sharp knife or pizza cutter is useful for trimming the edges to size once assembled. Parchment paper or wax paper is essential for wrapping and freezing.
Ingredients
For the Vanilla Bean Ice Cream
- Vanilla Beans: To ensure a rich and aromatic flavor, look for plump and fragrant vanilla beans. These can typically be found in your local grocery store’s spice aisle or gourmet section.
- Heavy Cream: Opt for high-quality heavy cream for a luscious, creamy texture in your homemade ice cream. Available in the dairy section.
- Whole Milk: Using whole milk will contribute to your ice cream’s creaminess and rich mouthfeel. Make sure it’s fresh for the best results.
- Granulated Sugar: Regular granulated sugar is essential for sweetness and aids in achieving a smooth texture when the ice cream freezes.
- Egg Yolks: Egg yolks add a creamy richness and help to thicken the ice cream mixture. Choose fresh, free-range eggs if possible.
For the Waffles
- Square Waffles: You can either make homemade waffles using a waffle maker or buy pre-made waffles from the frozen food section. Look for options that are thick and fluffy for better sandwiching.
Optional Topping Ideas
- Chocolate Sauce: For an extra indulgent touch, drizzle rich, velvety chocolate sauce on top. Various brands are available in the ice cream toppings section.
- Sprinkles: Add a fun and colorful element with sprinkles. They make for a visually appealing treat in the baking aisle, especially for kids.
- Chopped Nuts: Chopped nuts enhance the texture and add a subtle, nutty flavor to your sandwiches. Choose from almonds, pecans, or walnuts for a delightful crunch.

Substitutions and Additions
Ice Cream Substitutions
- Vanilla Beans: If you can’t find vanilla beans, vanilla bean paste or pure vanilla extract can be used as a substitute. Vanilla bean paste provides a similar rich flavor and beautiful speckled appearance.
- Heavy Cream: For a lighter option, you can substitute half-and-half or a combination of whole milk and evaporated milk, although this may slightly affect the creaminess.
- Whole Milk: Almond milk, coconut milk, or oat milk can be used as dairy-free alternatives, though they may alter the texture and flavor slightly.
- Granulated Sugar: Coconut sugar, honey, or maple syrup can be used as natural sweeteners but may impart a distinct flavor to the ice cream.
- Egg Yolks: For an egg-free version, consider using cornstarch or a custard powder mix as a thickening agent.
Waffle Substitutions
- Square Waffles: If square waffles aren’t available, any shape will do. Depending on your dietary preferences, you can also use gluten-free, Belgian waffles, or buttermilk waffles waffles.
Topping Ideas
- Fresh Fruit: Consider adding fresh berries, banana slices, or mango chunks for a refreshing twist.
- Caramel Sauce: Swap out chocolate sauce for caramel for a different layer of sweetness.
- Crushed Candy: Elevate the fun factor with crushed candy bars, such as peanut brittle, toffee, or peppermint bark, adding both flavor and texture.
- Coconut Flakes: Enhance the tropical vibe by sprinkling toasted coconut flakes on your ice cream sandwiches.
- Marshmallow Fluff: Spread a layer of marshmallow fluff on the waffles before adding the ice cream for an extra gooey delight.
Instructions
- Remove the ice cream from the freezer 15 minutes before serving to allow it to soften.
- Preheat the oven to 350°F and place the waffles on a large, rimmed baking sheet.
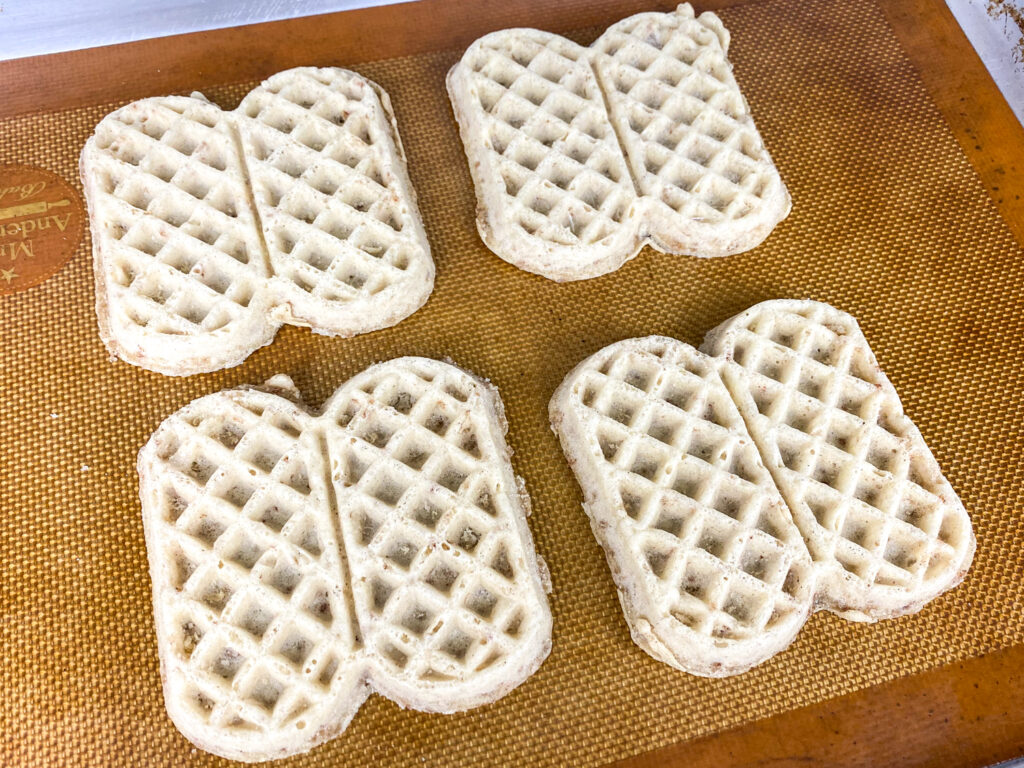
- Place the baking sheet in a preheated oven and bake for 10-12 minutes, turning the waffles halfway through. Once the waffles are golden brown, remove the baking sheet from the oven and let them cool for a few minutes.
- Place a scoop of ice cream on four waffles and spread it evenly. Top each with one of the remaining toasted waffles to create a “sandwich.”
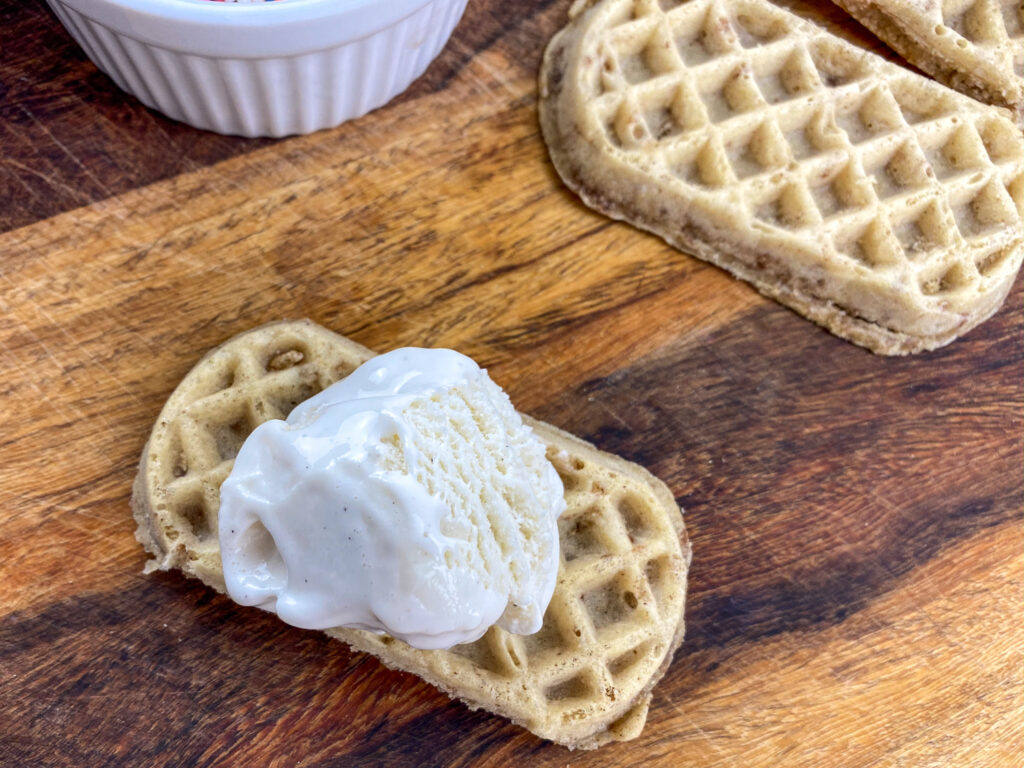
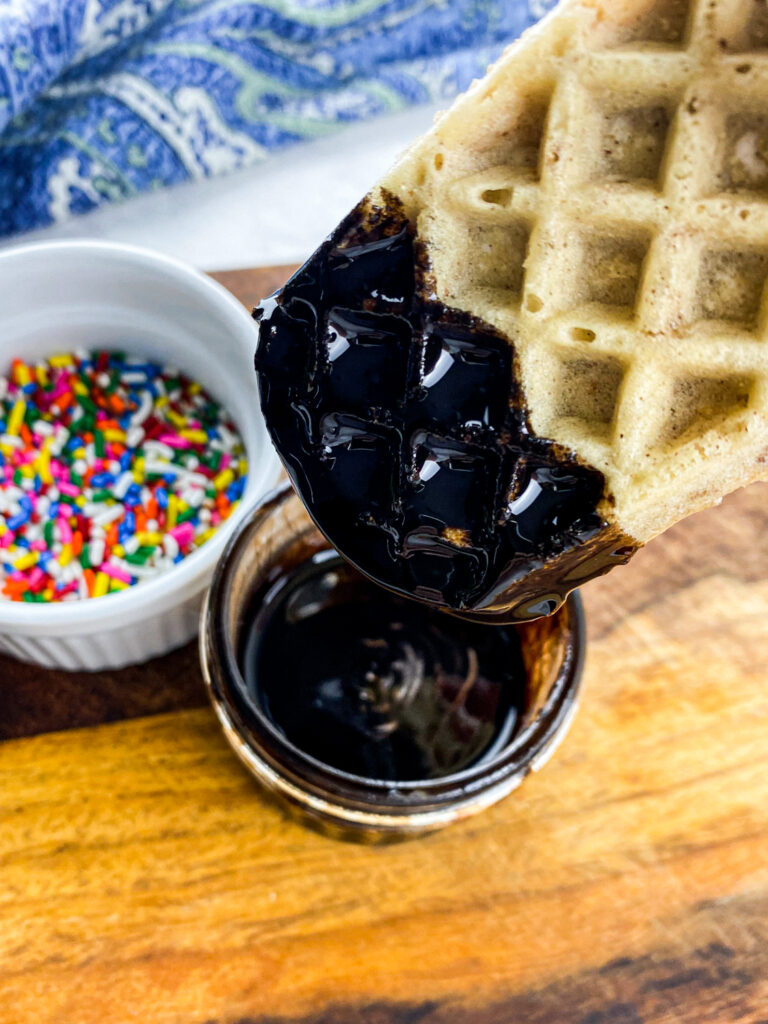
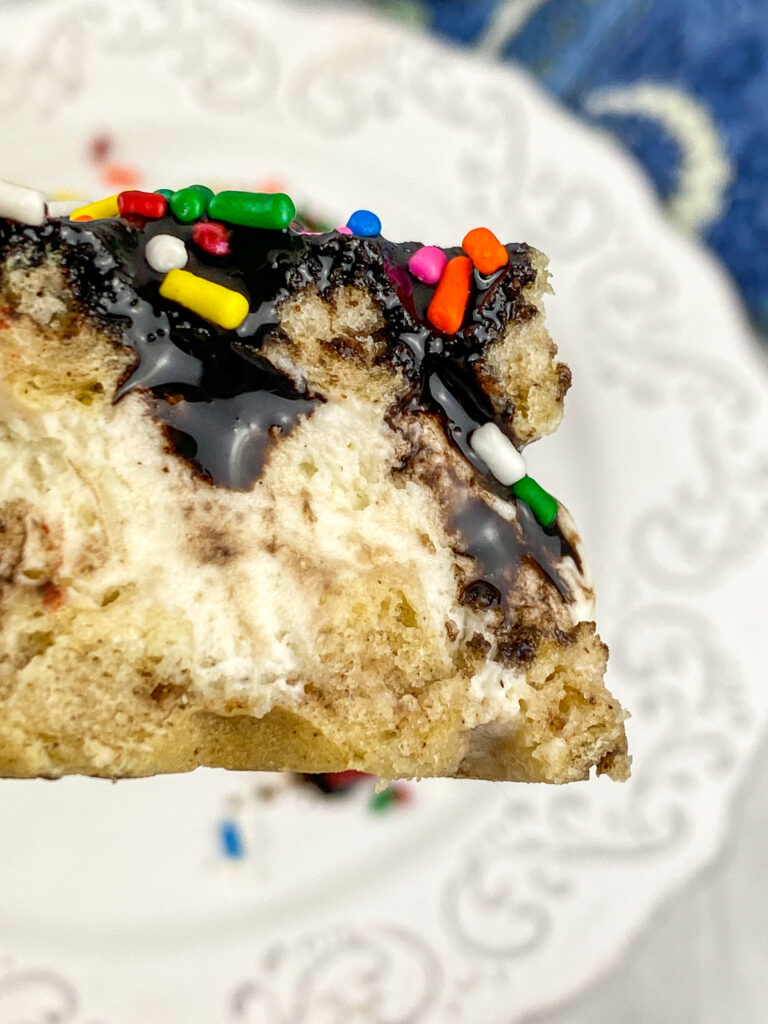
- Place the ice cream sandwiches back on the baking tray and freeze for 30 minutes to firm up. Just before serving, remove the baking sheet from the freezer and top with chocolate sauce, sprinkles, and/or chopped nuts, if desired.
Recipe Tips
- Cook the waffles a shade darker than you think. They’ll soften in the freezer, so you want a good amount of crispness going in. Pale waffles turn soggy fast.
- Cool the waffles completely before assembling. Even slightly warm waffles will melt the ice cream immediately and make assembly a nightmare.
- Slightly soften the ice cream first. Pull the ice cream out of the freezer 5–10 minutes before you need it. It should be soft enough to scoop easily and spread to the edges, but not so melted it runs.
- Press firmly when assembling. A confident press helps the ice cream fill the waffle pockets evenly and prevents air gaps.
- Freeze assembled sandwiches on a flat tray first. Lay them flat in the freezer on a baking sheet for 30–60 minutes before wrapping, so they hold their shape.
- Trim the edges for a neater finish. Once frozen, use a sharp knife to trim any ice cream that’s escaped the edges. It makes them look much more polished.
Serving Suggestions
Pairing your homemade ice cream sandwiches with a few complementary treats can elevate your dessert experience. Here are some ideas on what to serve alongside:
- Fresh Berries: A bowl of mixed fresh berries, such as strawberries, blueberries, and raspberries, can add a burst of freshness and a touch of tartness to balance the sweetness of the ice cream sandwiches.
- Whipped Cream: Light and airy whipped cream is a classic accompaniment. Try adding a hint of vanilla or a sprinkle of cinnamon for an extra treat.
- Fruit Sorbet: A scoop of fruit sorbet can provide a refreshing contrast to the creamy richness of the ice cream sandwiches. Mango, lemon, or raspberry sorbet are great options.
- Coffee or Espresso: A hot cup of coffee or a shot of espresso can complement the cool, creamy texture of the ice cream, creating a delightful contrast in temperatures and flavors.
- Prosecco or Sparkling Wine: If you’re serving adults, a glass of prosecco or sparkling wine can add a touch of elegance and a festive feel to your dessert course. The bubbles help cleanse the palate between bites.
- Roasted Nuts: Serve a small bowl of roasted or candied nuts, such as almonds, pecans, or hazelnuts, for a crunchy contrast to the smooth ice cream.
Ice Cream Flavor Variations
One of the best things about this ice cream waffle sandwich recipe is how easily you can change it up. Vanilla is the classic starting point, but once you’ve got the technique down, the combinations are endless.
Strawberry ice cream is a natural match for the buttery vanilla waffle — the fruit flavour cuts through the richness and makes for a gorgeous pink-and-gold sandwich. This works especially well in summer when strawberries are in season.
Chocolate ice cream turns this into something a little more indulgent. You can also take it further by pressing the edges of the assembled sandwich into mini chocolate chips or crushed chocolate cookies before freezing. The waffles and chocolate ice cream combination is hard to beat — and if you’re a chocolate lover, the no-churn chocolate toffee ice cream on the blog makes a spectacular filling.
Peach ice cream or peach frozen yoghurt is a particularly summery choice that works beautifully with the lightly sweetened waffle. The peach-and-cream flavour profile is very much on brand with summer baking, and if you want to try a homemade option, banana cream frozen yoghurt is a great no-churn filling to experiment with.
Coffee ice cream is a grown-up option that works surprisingly well — the slightly bitter coffee flavour is a great contrast to the sweet waffle. Roll the edges in chopped toasted pecans after assembling for an extra layer of texture.
Mint chocolate chip is a crowd-pleaser, especially with kids. The green ice cream against the golden waffle looks great and the mint flavour is refreshing on a hot day.
Make Ahead Tips
These ice cream waffle sandwiches are one of the easiest desserts to get ahead of, which makes them ideal for parties and busy summer weekends.
You can bake the waffles up to three days in advance. Once fully cooled, stack them with a sheet of parchment between each one and store them in an airtight container at room temperature. They’ll stay crisp and ready to assemble whenever you need them.
The assembled sandwiches can be made up to two weeks ahead. Wrap each one individually in parchment or wax paper, then place them in a freezer-safe bag or airtight container. Label them with the date and the ice cream flavour if you’re making multiple varieties. Pull them straight from the freezer to serve — there’s no thawing needed, though letting them sit for 2–3 minutes makes the first bite a little easier.
If you’re making these for a birthday party or gathering, assembling them a day or two ahead takes all the stress out of dessert. Just pull the container from the freezer when you’re ready and you’re done.
Serving Suggestions
These are wonderful straight from the freezer just as they are, but there are a few ways to dress them up a little if you want to make them feel more special.
A drizzle of warm caramel or chocolate sauce over the top right before serving adds a nice contrast of warm and cold. You can also roll the exposed ice cream edges in toppings before the final freeze — sprinkles are the obvious choice for kids, but crushed cookies, mini chocolate chips, or finely chopped toasted nuts all work well for a more grown-up version.
For a proper summer dessert spread, serve these alongside classic cherries jubilee or a bowl of chocolate covered strawberries for a crowd-pleasing dessert table. If you love the waffle-and-ice-cream combination and want to branch out, the blueberry almond ice cream wafflewiches on the blog are another great variation to try.
For birthday parties, set up a little assembly station with the baked waffles, a few different ice cream flavours, and an array of edge toppings so guests can build their own. It’s interactive, fun, and genuinely works for all ages.
Storage & Reheating
Freezing: These sandwiches are designed to be frozen, so this is absolutely the way to go. Wrap each assembled sandwich individually in parchment or wax paper, then store in a freezer-safe zip bag or airtight container. They keep well for up to 2 weeks — after that, the waffles can start to lose some of their texture.
Serving from frozen: No thawing needed. Pull them straight from the freezer and let them sit for 2–3 minutes at room temperature before serving, which softens the ice cream just enough to make them easy to bite into without being too hard.
Avoid refreezing: If the ice cream has fully melted, don’t refreeze the sandwiches as the texture of the ice cream won’t be the same once frozen again.
Storing baked waffles separately: If you want to bake the waffles ahead without assembling, store them at room temperature in an airtight container for up to 3 days, or freeze them flat and reheat in the toaster or a low oven (around 300°F / 150°C) for 5 minutes to re-crisp before using.
Recipe FAQ
Can I use store-bought waffles instead of homemade? You can, and it works well as a shortcut. Look for thicker, sturdier waffles rather than thin ones — they hold up better once frozen and give you a better ratio of waffle to ice cream. Toasting them lightly before use helps crisp them up and improves the texture of the finished sandwich.
Why are my waffle ice cream sandwiches so hard to bite into straight from the freezer? This is normal — ice cream firms up considerably when frozen, and so does the waffle. Let the sandwich sit at room temperature for 2–3 minutes before eating. If they’re still very hard, your ice cream may have been refrozen multiple times; fresh ice cream straight from the store tends to freeze to a better, less icy texture.
Can I make these without a waffle maker? Technically yes — you can use round cookies, brownies, or even thick pancakes as the “bread” of the sandwich, though the result won’t be a waffle ice cream sandwich. If waffles are what you want, a waffle maker really is worth having. It opens up so many recipes beyond just this one, from lemon blueberry cheesecake waffles to peaches and cream waffles.
How do I stop the ice cream from squeezing out the sides when I press the waffles together? Make sure your ice cream is not too soft when you assemble. It should be scoopable but hold its shape — not runny. Place the scoop slightly off-centre toward the middle of the waffle, then press down slowly and evenly. The ice cream will naturally spread toward the edges without overflowing.
Can I make a dairy-free version? Yes — swap the milk and butter in the waffle batter for your preferred plant-based alternatives (oat milk and vegan butter both work well) and use a dairy-free ice cream. The texture may vary slightly depending on the products you use, but the recipe works as a base.
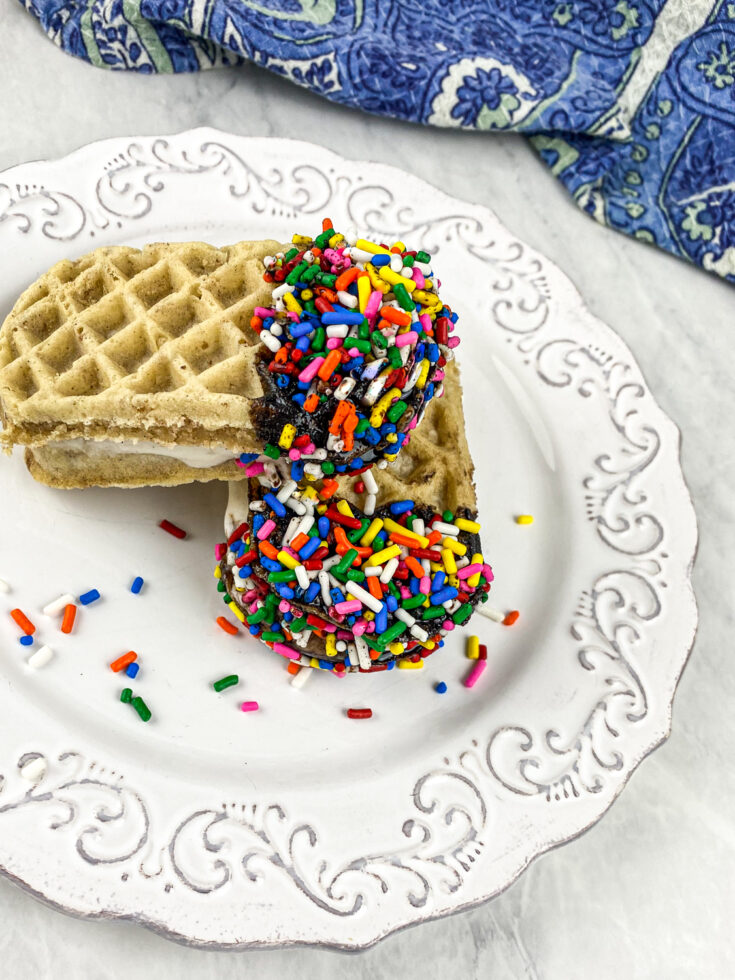
Homemade Vanilla Waffle Ice Cream Sandwich
Imagine indulging in the perfect combination of warm, golden waffles paired with a creamy scoop of homemade vanilla ice cream. The contrast of textures and flavors will transport you to a realm of pure culinary bliss.
Ingredients
- 1 qt. vanilla bean ice cream
- 4 square waffles, cut into 8 rectangles (or 8 Eggo® Wafflers)
Optional topping ideas:
- Chocolate sauce
- Sprinkles
- Chopped nuts
Instructions
- Remove the ice cream from the freezer 15 minutes before serving to allow it to soften.
- Preheat the oven to 350°F and place the waffles on a large, rimmed baking sheet.
- Place the baking sheet in a preheated oven and bake for 10-12 minutes, turning the waffles halfway through. Once the waffles are golden brown, remove the baking sheet from the oven and let them cool for a few minutes.
- Place a scoop of ice cream on four waffles and spread it evenly. Top each with one of the remaining toasted waffles to create a “sandwich.”
- Place the ice cream sandwiches back on the baking tray and freeze for 30 minutes to firm up. Just before serving, remove the baking sheet from the freezer and top with chocolate sauce, sprinkles, and/or chopped nuts, if desired.
Notes
- Work Quickly: When assembling your ice cream sandwiches, work quickly to prevent the ice cream from melting too much. Keeping the ice cream in the freezer until the last minute can help.
- Use Parchment Paper: Lining the baking sheet with parchment paper before placing the waffles makes cleanup easier and prevents sticking.
- Cutting Board Hack: For even waffle squares, use a large cutting board to quickly slice multiple waffles at once.
- Chill Utensils: Chill your utensils, such as the ice cream scoop and the serving spoon, to make handling the ice cream easier and less messy.
- Perfect Scoops: Use an ice cream scoop with a release lever to ensure even-sized scoops of ice cream, which will melt more uniformly.
- Wrap Individually: If you don’t plan to serve all the sandwiches at once, wrap each one individually in plastic wrap before freezing. This keeps them fresh and prevents freezer burn.
- Toast Evenly: Make sure that the waffles are evenly toasted so that they provide a good contrast in texture against the soft ice cream.
- Add Between Layers: Place any additional toppings like caramel sauce or crushed candy between the ice cream and the top waffle to help them stick better.
Nutrition Information:
Yield:
4Serving Size:
1Amount Per Serving: Calories: 362Total Fat: 18gSaturated Fat: 5gTrans Fat: 0gUnsaturated Fat: 12gCholesterol: 66mgSodium: 436mgCarbohydrates: 41gFiber: 1gSugar: 13gProtein: 9g
Enjoyed this recipe? Try the no-churn vanilla ice cream if you want to make the filling completely from scratch, or browse the classic apple pie à la mode for another ice cream dessert that never gets old. Got a favourite ice cream flavour combination for your waffle sandwiches? Share it in the comments below — I’d love to know what you’re trying!
Sign up for the Peacock Baking newsletter and get new recipes, baking tips, and seasonal inspiration straight to your inbox.


