As an Amazon Associate I earn from qualifying purchases and sometimes recommend products from other sellers at no extra cost to you. For more details see my disclosure policy and privacy policy.
You’re halfway through melting chocolate for a recipe, and in the space of a few seconds it goes from glossy and smooth to a grainy, clumped mess that looks nothing like chocolate at all. That’s seized chocolate, and it’s one of the most common (and most frustrating) things that can happen to a home baker.
The good news: it’s usually fixable. The better news: once you know why it happens, it’s easy to stop it happening again.
🍫 What Seizing Actually Is
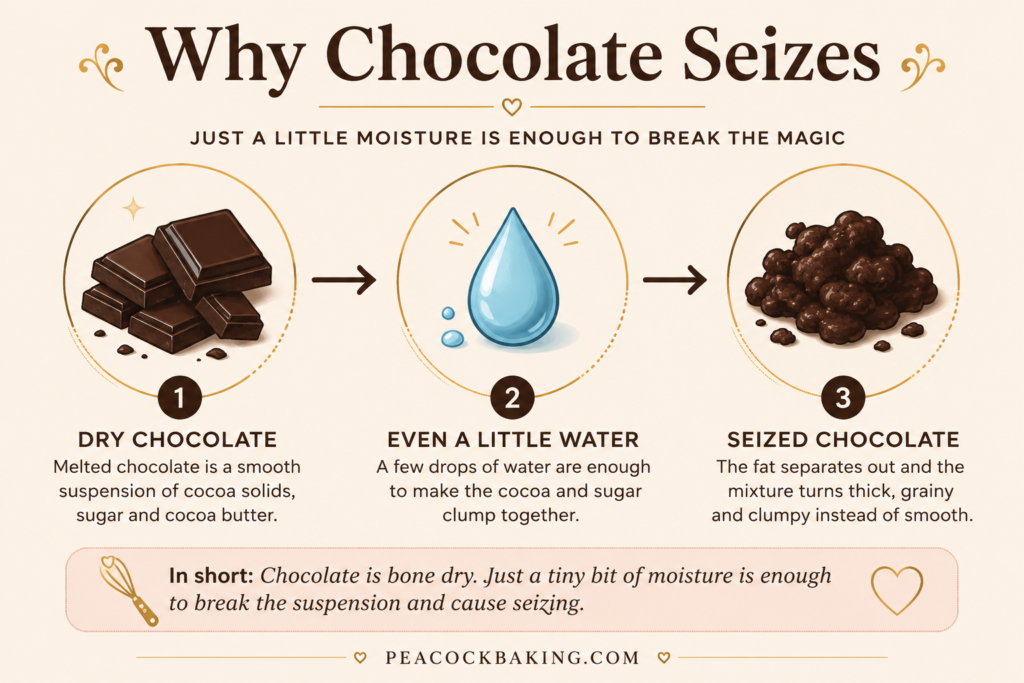
Melted chocolate is a smooth suspension of cocoa solids and sugar in fat (cocoa butter). Seizing happens when that suspension breaks. The fat separates out, the cocoa and sugar particles clump together, and you’re left with a stiff, grainy paste instead of a silky liquid.
There are two main causes, and they’re both about disrupting that fat-based structure.
Moisture contamination. This is the big one. Chocolate is bone dry, so even a tiny amount of water, a splash from a steaming pan, a wet spoon, condensation dripping off a lid, is enough to send it into a spin. Counterintuitively, a small amount of moisture is worse than a lot. A few drops aren’t enough to loosen the mixture, but they are enough to make the sugar and cocoa solids clump together and drag the fat out of suspension.
Overheating. Chocolate is fussy about temperature. Push it too hot, especially over direct heat rather than a gentle double boiler, and the structure breaks down in a similar way, even with no water in sight.
🥄 The Fix That Actually Works
If your chocolate has seized, don’t panic and don’t reach for more chocolate (more on why that doesn’t work below). Instead:
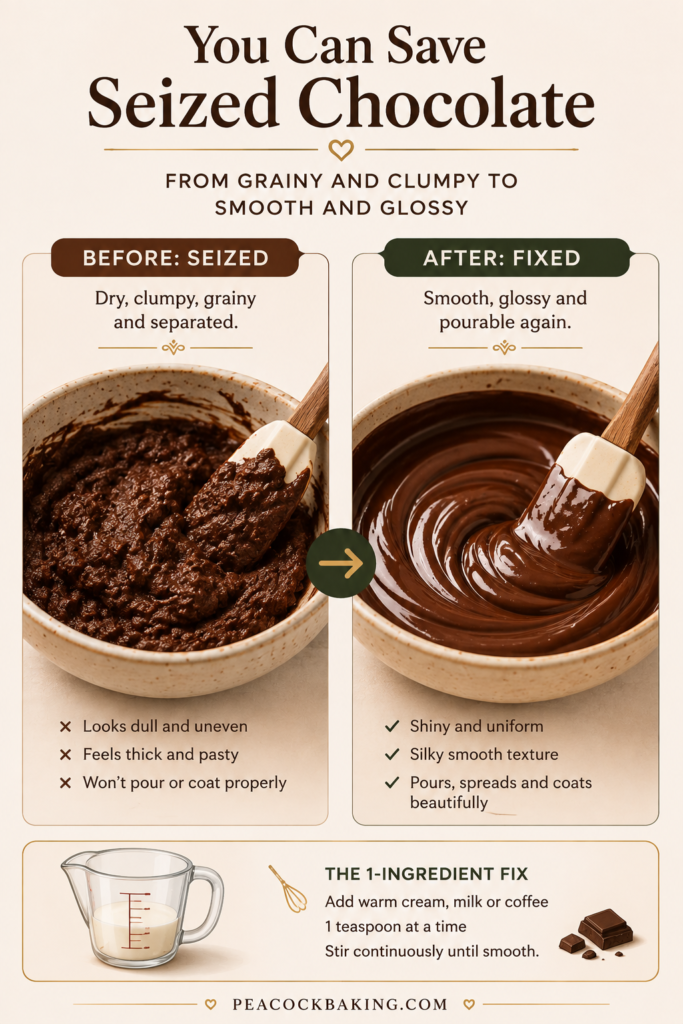
- Warm a small amount of liquid, cream, milk, or even strong coffee, until it’s warm but not boiling.
- Add it to the seized chocolate a teaspoon at a time, roughly one teaspoon of liquid for every two ounces of chocolate.
- Stir continuously and vigorously over low heat as you add each addition.
- Keep going until the mixture smooths back out into a glossy, pourable consistency, similar to a loose ganache.
This works because you’re deliberately finishing what the accidental moisture started. A small splash of water breaks the structure because there isn’t enough of it to keep the cocoa and sugar particles coated and moving freely. Adding enough warm liquid, especially one with a bit of fat in it like cream or milk, recoats those particles properly and brings the mixture back into a smooth suspension.
❌ Why “Just Add More Chocolate” Doesn’t Work
It’s a tempting instinct: if moisture caused the problem, surely diluting it with more chocolate will fix it? Unfortunately it doesn’t. Adding more dry chocolate just adds more cocoa solids and sugar for the existing moisture to cling to, so you usually end up with a bigger, still-grainy mess. The same goes for trying to “dry it out” over heat. Chocolate doesn’t correct itself with more cooking, and extra heat is more likely to scorch it than fix it.
🍰 When Seized Chocolate Can (and Can’t) Be Saved
Be realistic about what you’re rescuing. Once you’ve stirred in warm liquid, seized chocolate can usually be brought back to a smooth, glossy consistency, but it won’t necessarily behave like melted chocolate again for every purpose.
It generally won’t work for its original job if that job was dipping, coating, or drizzling for a clean, thin finish, since the added liquid changes the texture and it won’t set hard and glossy the way tempered chocolate does.
It generally will work beautifully repurposed into something that wants a soft, fudgy texture:
- Stir it into brownie or blondie batter
- Loosen it further into a warm chocolate sauce for ice cream or pancakes
- Whisk in a little extra warm milk to turn it into a rich hot chocolate
- Use it as a simple glaze where a slightly softer set doesn’t matter
If your chocolate seized badly and even the liquid fix leaves it stubbornly gritty, it’s fair to accept it’s not salvageable for that recipe and repurpose or start again. That happens sometimes, and it’s not a reflection of your technique.
🛡️ Preventing Seized Chocolate Next Time
Prevention comes down to keeping your setup bone dry and your heat gentle.
- Dry everything first. Bowls, spoons, whisks, all of it. Even a rinsed bowl that looks dry can carry enough moisture to cause problems.
- Watch for steam. If you’re using a double boiler (and for melting chocolate, you should be), make sure the bowl sits above the water rather than touching it, and keep the water at a gentle simmer rather than a rolling boil, since aggressive steam can condense on the underside of the bowl and drip back in.
- Don’t cover the bowl. A lid traps condensation, and that condensation ends up right back in your chocolate.
- Melt gradually. Low, steady heat with frequent stirring gives you far more control than trying to rush it.
- Start with good chocolate. Not all chocolate behaves the same way under heat. A well-made baking-grade dark chocolate with a proper cocoa butter content melts more predictably than cheaper bars bulked out with other fats, which can be more temperamental even with careful technique. If you want the fuller picture on choosing chocolate for baking, this guide to the best chocolate for baking is worth a look.
For the correct step-by-step method on melting chocolate in the first place, our guide on how to melt chocolate at home covers the technique in full, this post is deliberately focused on troubleshooting rather than repeating that ground.
🔬 The Quick Science Note (Optional Reading)
If you want the slightly deeper “why,” it comes down to ratios. Chocolate is a delicate balance of cocoa solids, sugar, and fat. Cocoa particles are hydrophilic, meaning they’re attracted to water, while the fat around them is not. Introduce a small amount of water and the cocoa and sugar particles clump together around it, pulling away from the fat that was holding everything smooth. That’s the seize.
Add enough additional liquid, though, and there’s finally enough to coat every particle evenly rather than just clumping a few together, which is what brings the mixture back to a smooth, flowing state. It’s a neat bit of food science, but you don’t need to remember any of it to fix the problem, just the teaspoon-at-a-time method above.
❓ Quick Answers to Common Questions
Can I fix seized white or milk chocolate the same way? Yes, the same warm-liquid method works for white and milk chocolate. Both are more delicate than dark chocolate because of their higher milk solid and sugar content, so add your warm liquid a little more slowly and keep the heat especially low.
What if I don’t have cream or milk on hand? Warm water works in a pinch, though it won’t give you quite the same glossy, rich finish as cream or milk. Coffee, dairy-free milk alternatives, or a splash of liqueur (if the recipe allows for it) all work using the same ratio.
Can I use the double boiler water itself to fix it? It’s better not to. That water has likely picked up a bit of chocolate residue and can be inconsistent in temperature. Warm a small measured amount of fresh liquid separately instead, so you’re in control of exactly how much you’re adding.
Does the type of chocolate matter for how easily it seizes? Yes. Chocolate with a higher percentage of cocoa butter tends to behave more predictably than lower-quality bars bulked out with vegetable fats or a lot of added sugar, which is part of why starting with a good quality bar makes prevention easier in the first place.
The Bottom Line
Seized chocolate is common, usually fixable, and not a sign you’ve done anything wrong. Keep your tools dry, your heat gentle, and a little warm cream on standby, and you’ll rarely be caught out. When it does happen, you now know exactly what to do.